
The reason behind the lack of posts has been the appalling pictorial documentation; my phone's camera isn't so great for close up photos of 1/72 figures. I shake the camera and I have no good way of stabilizing it, so pictures tend to be a bit uninteresting or worse, blurry.
Still, I enjoy having written and illustrated records of my gaming activities, and I decided to make some simple map-type illustrations for the latest encounter. I forgot how much I love arrows that show movement. Strange but true!
I generated the scenario with THW's War Against Japan. PEFs and Japanese forces were all controlled using that same title.
I used Featherstone's Nuts! for the game itself, with the morale method from Featherstone's War Games added, and I changed the save results, such that, a figure that received 1 hit, ducked on a save, with 2 simultaneous hits and saves, moved 1 move away from enemy and ducked, and with 3 simultaneous hits and saves, moved 1 move away from enemy and hunkered down, requiring a friendly figure to make contact to rally.
Mission: Advance
My Force (USMC) : 1 platoon of 3 squads (I used 8 figure squads), plus platoon HQ (4 figs)
- 1st Squad- NCO- Rep 5, Jr NCO - Rep 4, Riflemen - Rep 4
- 2nd Squad- NCO- Rep 5, Jr NCO - Rep 4, Riflemen - Rep 5
- 3rs Squad- NCO- Rep 5, Jr NCO - Rep 3, Riflemen - Rep 3
- HQ - NCO - Rep 5, Jr NCO - Rep 4, Riflemen - Rep 3
My Objective: Reveal and eliminate all PEF encounters, and majority of Possible Contact markers, while sustaining no more than 1/3 casualties.
The map was generated using the terrain generator from War Against Japan.
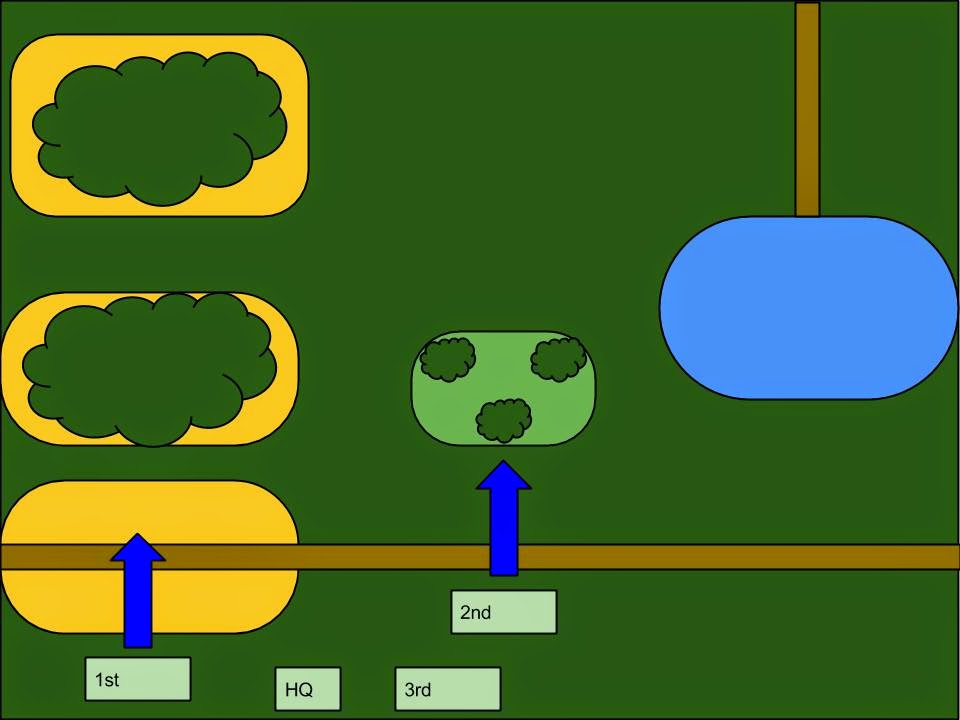 |
| Initial dispositions and movement. |
 |
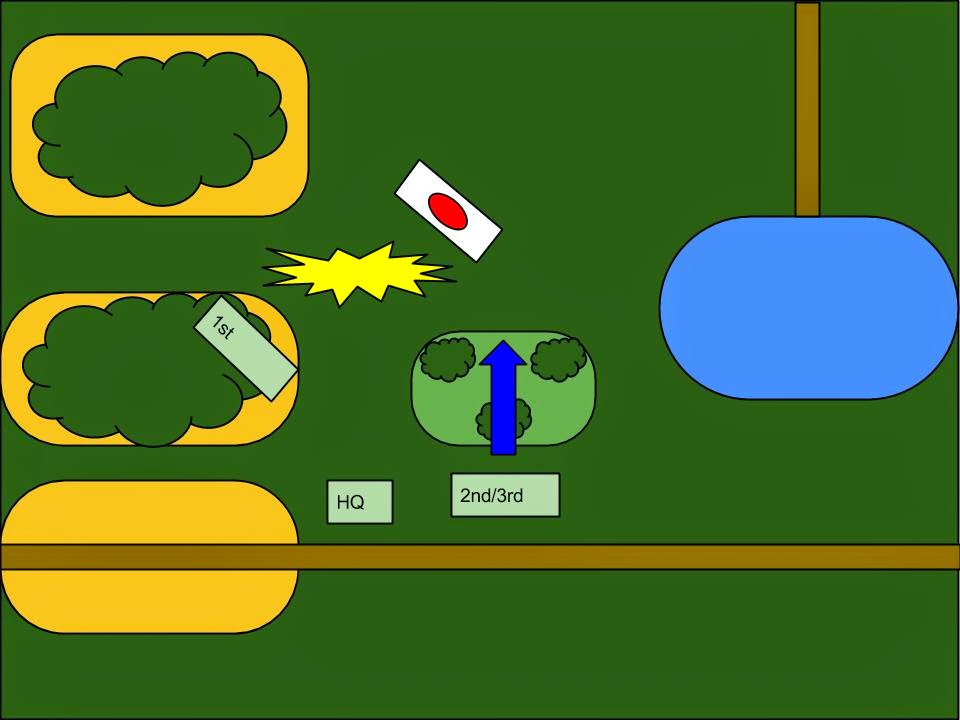
| Contact! |
With 50% casualties, 2nd squad fell back. 3rd squad was shot up by the LMG as well, and forced to fall back. 1st Squad moved up to engage the Japanese force.
 |
| Things go South |
 |
| 2nd attempt. |
 |
| The Japanese were more committed than we were. |
My platoon fell back to nurse their wounds.
***
The morale rules never came into play, as I chose to have my squads fall back - preservation was part of my mission objective after all. I did like the new rules for saves, as it kept units together except under extenuating circumstances.
No comments:
Post a Comment